For some reason, when it’s time to make Christmas cards, my first thought is always to turn to linocuts. It’s a shame that my first thought doesn’t happen about four weeks earlier than it does, mind you, because I’d really like to spend a bit more time getting my technique nailed down.
That said, this is the first time I’ve tried doing a linocut of more than one colour, and to my amazement — despite a few nailbiting moments — it worked.
It’s a multi-step process, and as usual, I’ve been using the time I have each morning before work to get it done. That’s had the side effect that for much of the time I was working in a just-woken-up fog, so for my sake as much as for yours, I’m recording the process for future reference.
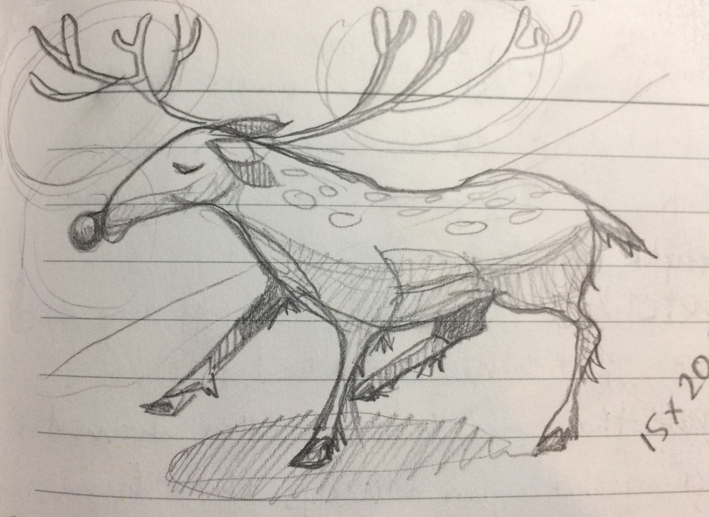
1. The original sketch
Sometime in early November, I was idly doodling in a notebook and out came a sketch I rather liked. Note to self, that would have been a good time to get started. But no, I didn’t think of it again until early December. As soon as I finish this blog post I’m going to put a note in my calendar for next year. Watch me dazzle everyone with efficiency in autumn 2018.
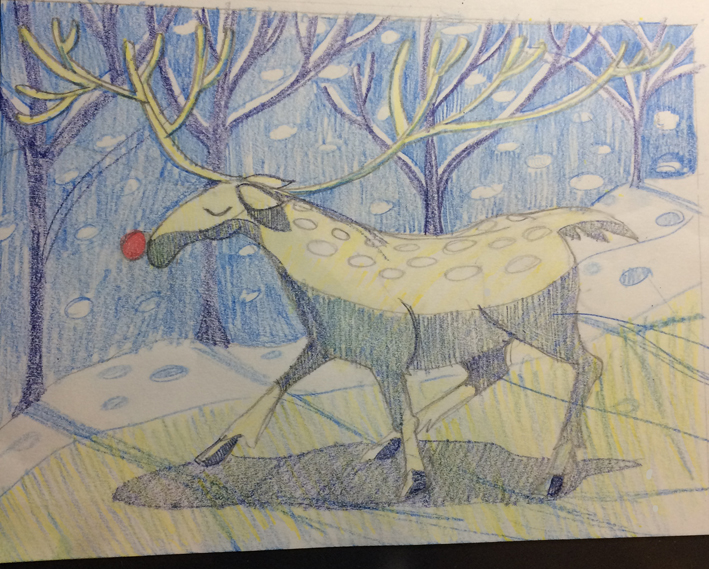
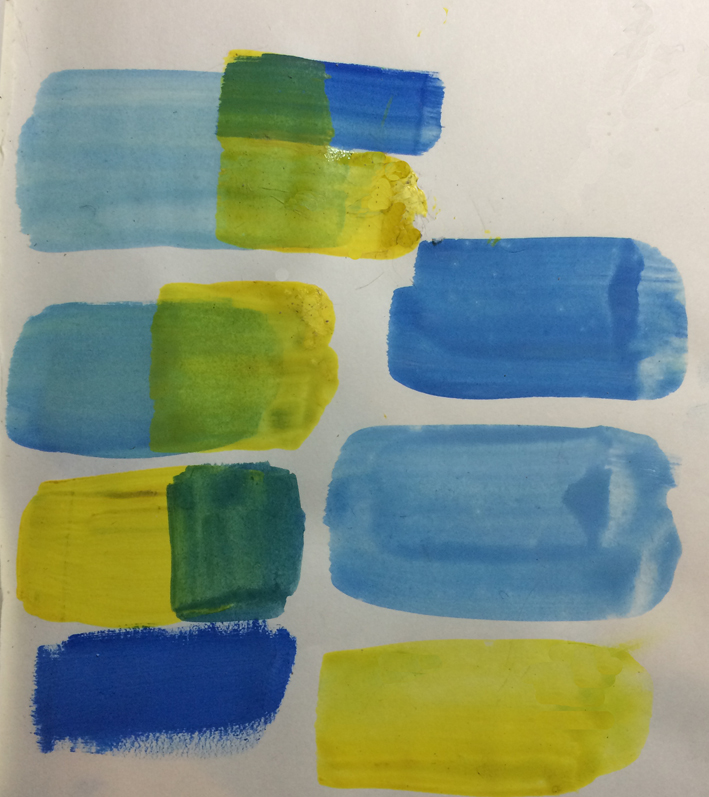
2. Colour tests
December came around, and I thought I’d try drawing up a colour picture from that initial sketch. I used pencil crayons (and less successfully, felt pens) to finalise the design.
I had some inks left over from previous projects, so I had some idea of what colours I’d be using. I tried out overlaying them in my sketchbook, so I could see the different colours that could be achieved with varying degrees of water or white ink mixed in.
As with many art media, you are supposed to make prints by putting down the lightest colour first (and in the end that’s what I ended up doing) but I did note that the yellow could be overlaid over the light blue to make quite a pleasant green. Anyway, look how many different tones you can make with just two colours and white!
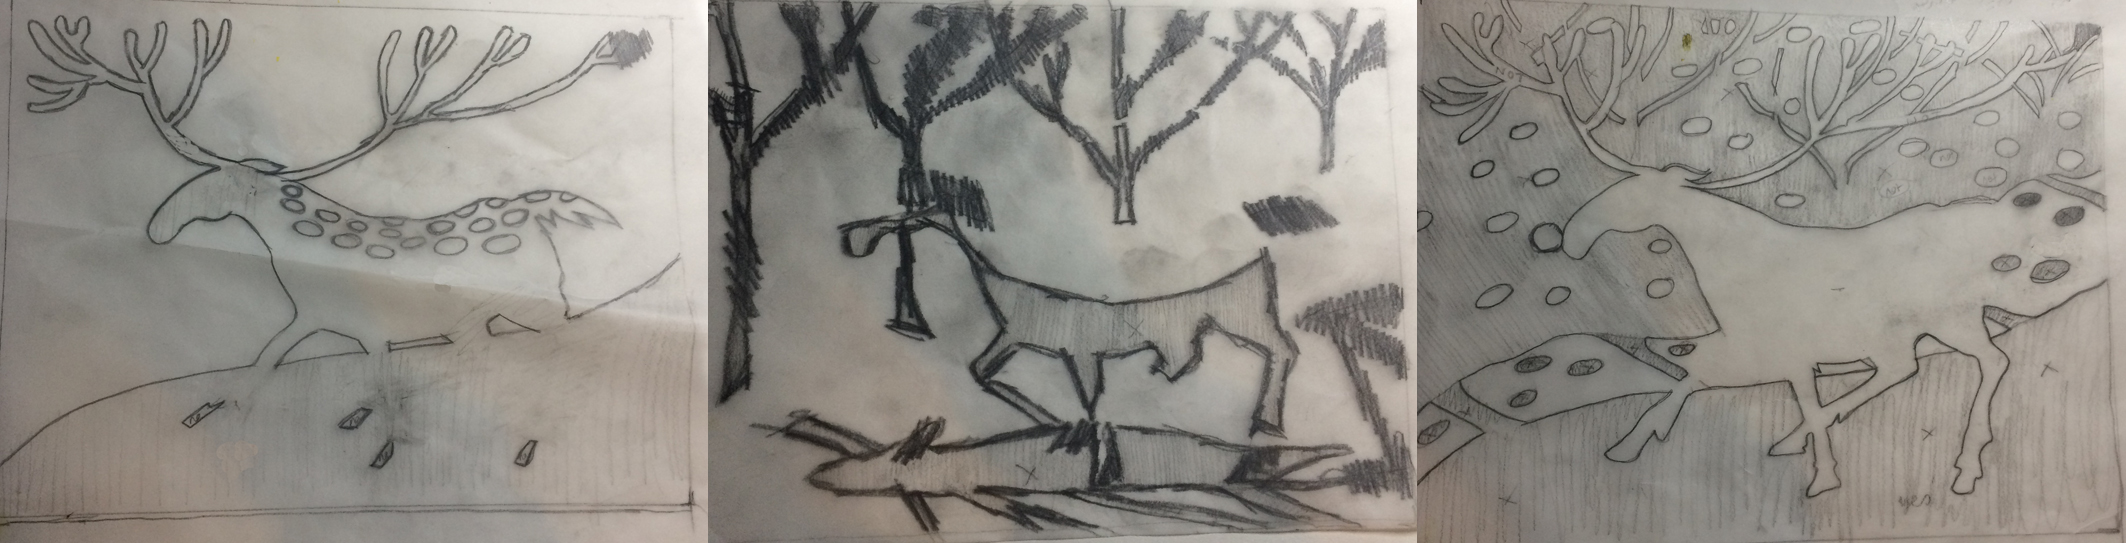
3. Tracing paper
I traced the picture so that I had three versions – one for each main colour (the 4th colour is the nose, so no complicated working out there).
4. Photoshop
At this point, if I was confident, I could have gone straight to carving, but because I’d never done a multilayered print before I thought I’d scan in the tracing paper and colour each layer in Photoshop to ensure that they lined up as I was expecting.
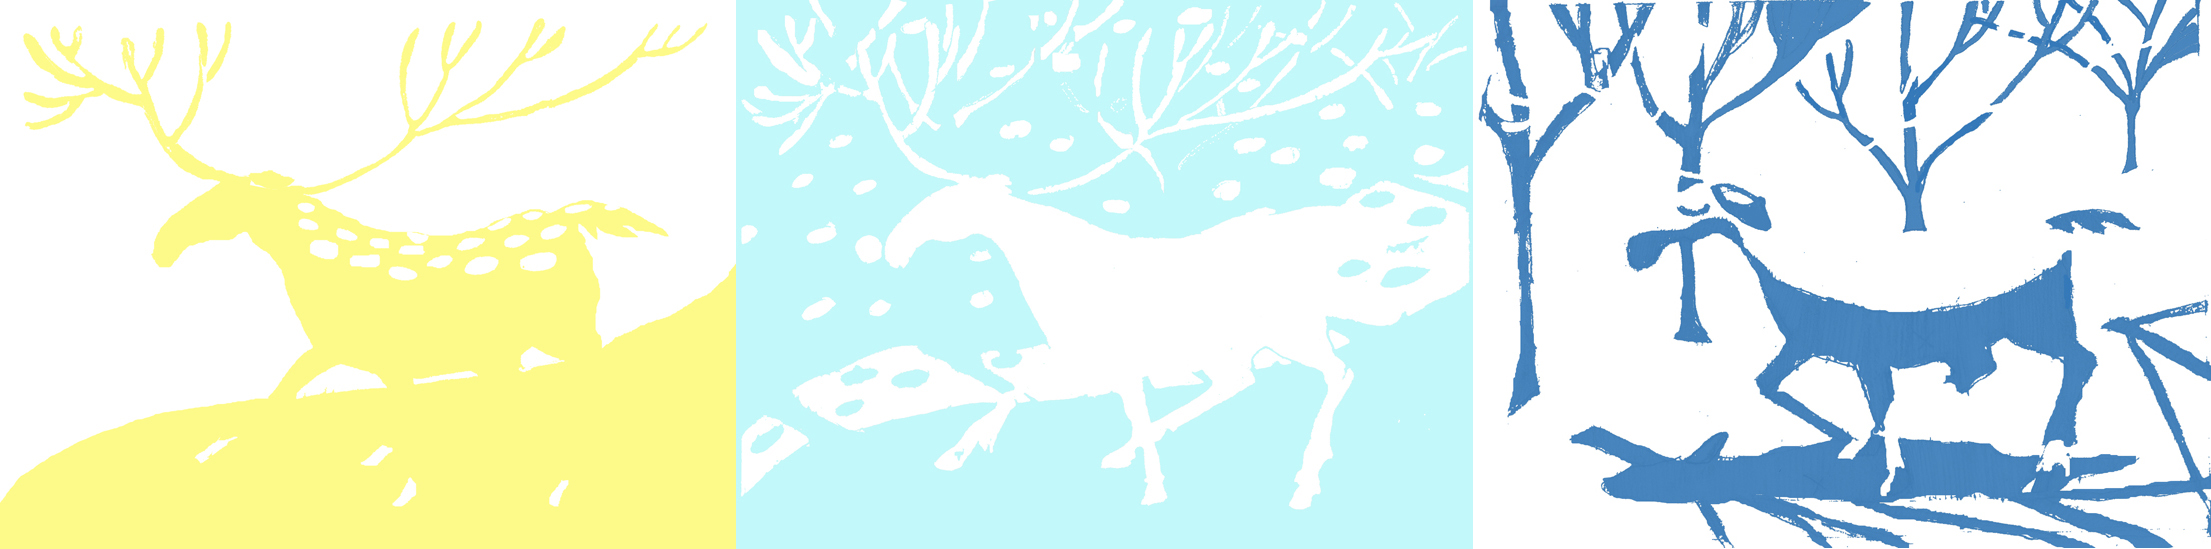

It worked! Mind you, this is in the lovely clean world of Photoshop, with each colour set to 50% opacity, which I didn’t know I’d be able to achieve with the inks. Then again, it was a relief to think that even if the lino prints didn’t really work out, I could always print these from my computer!
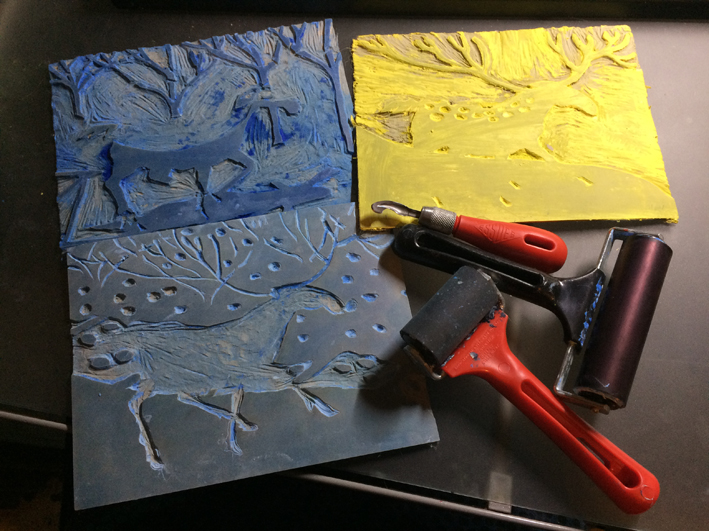
5. Carving
The two main things to remember when carving the lino are that a) you have to do it back to front, so the reindeer pointed to the right; and b) you remove the parts where you don’t want any ink. That might sound obvious but in my experience it’s easy to get confused! And a) is particularly important if you are including writing. Not a consideration for me this time, thank goodness.
6. Test prints

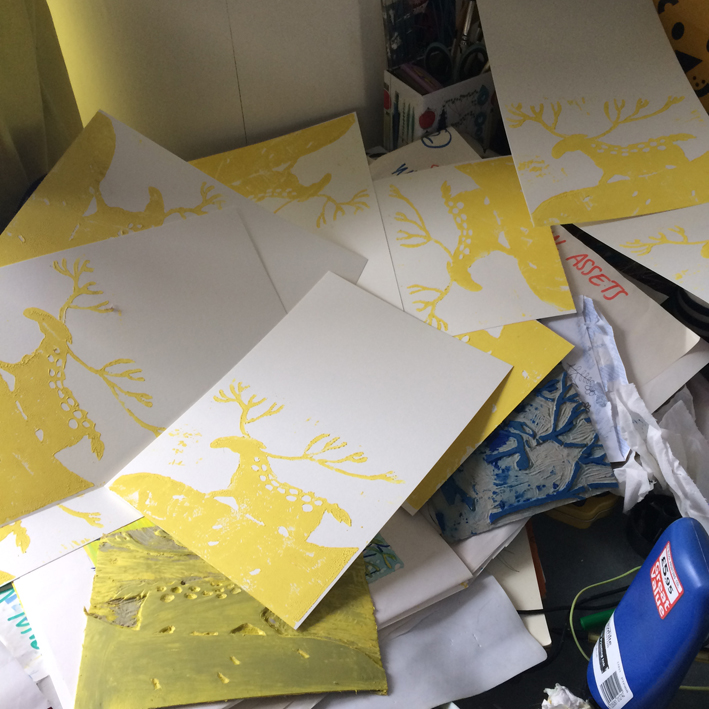
I happened to have a roll of newsprint around, so I tried out various colour combinations and the order of overlays. I’m quite glad I did this, as it meant I had some techniques for higher-quality results all worked out by the time I moved onto proper, more expensive paper.
My top tips here are: a) keep some tissue around to wipe clean the parts where you don’t want ink, because as you make prints it tends to accumulate; b) make little corner marks when you position the first piece of lino, so you can line up the subsequent ones; c) keep the ink reasonably light, but roll over the paper multiple times to make sure you’ve covered every part; d) after you’ve finished, wash the lino with a damp cloth, but don’t get it too wet or it will start curling up. I let mine flatten out under a pile of heavy books.
7. Print!
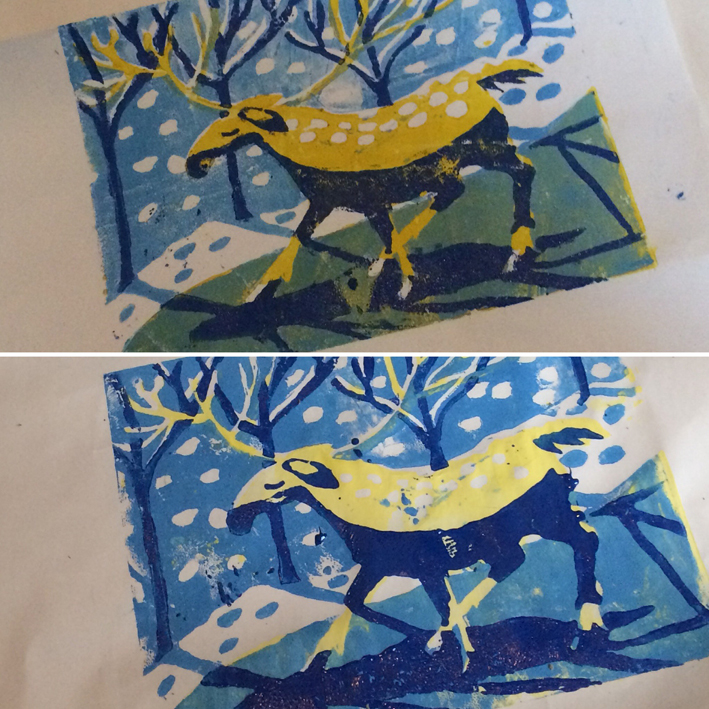
First colour down:
2nd colour (after a 24 hour wait so the first colour could dry):

And third. Thank goodness, it worked! I’d been a bit worried looking at the two-colour prints, but it was the darker blue that tightened it all up.

The final touch was the red nose on each. I did carve a wee circle but in the end it was easier just to paint these by hand:
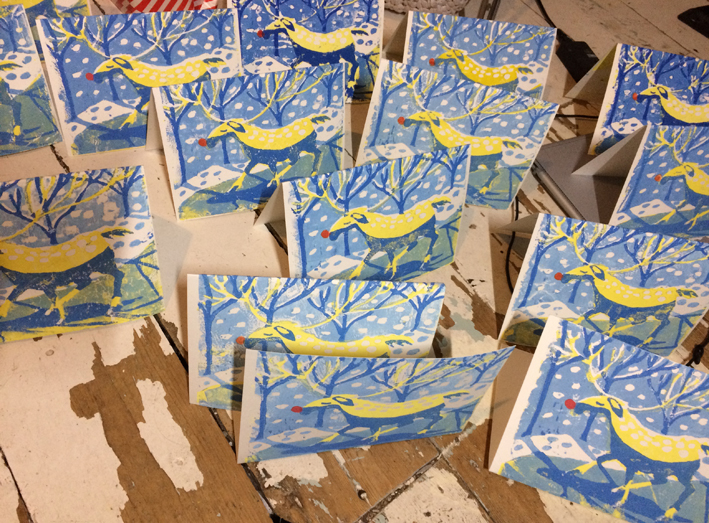
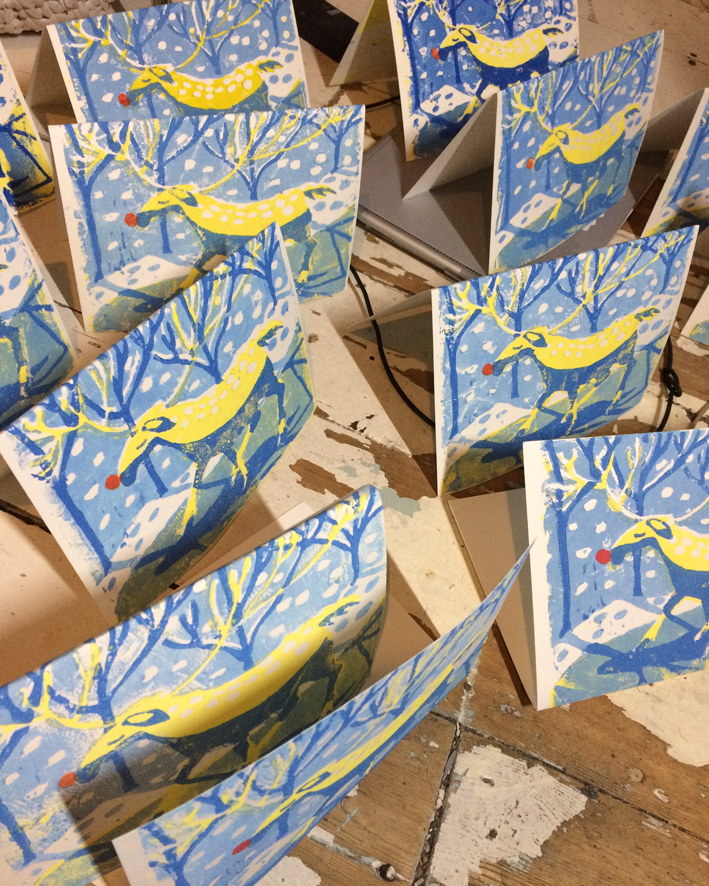
And there you go – finished. If you receive a Christmas card from me this year, now you know what went into it. Don’t expect one quite yet though… they’re taking a little time to dry… relatedly, I may also need to remove a few cat hairs :)
My final tip is to make loads more than you think you’ll need. I did this and I still came out with slightly fewer perfect ones than the number of people on my list. Hopefully people will like the imperfect ones just as much. And let’s not even mention the several prints I did before thinking through which end of a piece of paper they’d need to be to be able to fold them into a card…
I would like to take some more time to get better at lino cuts: some of the ones I’ve seen online are so clear cut (literally) and adept, while these are much less predictable and every one is different. Not necessarily a bad thing but it’d be nice to be more in control.